3D Printing
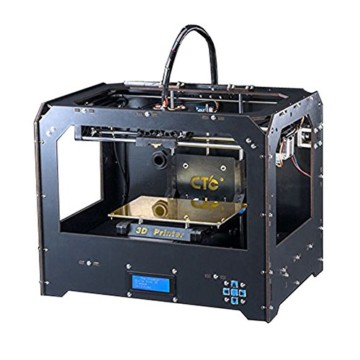
CTC Bizer Dual Nozzle
| CTC 3D PRINTER "BIZER" WITH DOUBLE NOZZLE | |
|---|---|
 |
|
| Model | Bizer |
| Sometimes Called |
|
| Lineage | Clone of FlashForge, which is a clone of MakerBot |
| Company | Zhuhai CTC Electronic Co., Ltd |
| Website | http://www.ctcprinter.com/ |
| Official Manual | http://www.ctcprinter.com/u_file/images/16_06_29/33bca69ddb.pdf |
| Printable Upgrades | http://www.thingiverse.com/gaehl/collections/ctc-upgrades |
| SD Card Contents | CTC_SDCard_Files.7z 423M (as of August 2016) |
| Case Material | Wood |
| Input Voltage | AC 110V-230V |
| Output Voltage | DC 24V |
| Ports | USB2.0 type B, SD Card |
| Touch Screen | No |
| Printer Dimesion | 320 x 467 x 381mm |
| Buidling Size | 225 x 145 x 155mm |
| Packing size | 565 x 430 x 535mm |
| Layer Accuracy | 0.1mm-0.5mm |
| Positioning Accuracy | XY axis 0.011mm |
| SD Card Filesystem | FAT16, FAT32 |
| Input File Types | gcode (USB), x3g (SD card) |
| Extruder Model | MK8 dual nozzle |
| Extruder Type | Direct drive |
| Extruder Barrel Liner | PTFE (teflon), Length: 33.5mm, InnerDiam: 2mm, OuterDiam: 3mm |
| Extrusion Nozzle Flow | About 24 cc/hour |
| Nozzle Diameter | 0.4mm |
| Recommended Nozzle Moving Speed | 35-40 mm/s |
| Print Material | ABS or PLA with 1.75mm diameter filament |
| Drawing Software | Rhino3D, Proe, 3dMAX, CAD, UG, Soliwork, SketchUp (with STL plugin) |
| Slicer Software | ReplicatorG, west to CTC Chinese Version, Makerware Desktop |
| Board/Chipset | Makerbot MightyBoard (Chinese Knockoff) (MEGA 1280) |
| Firmware | CTC Creator 1.0 (can be upgraded to Sailfish) |
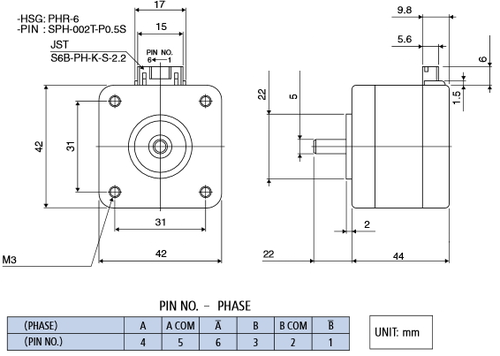
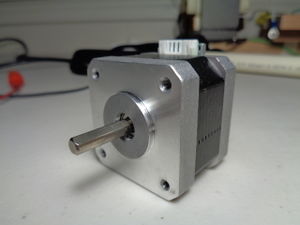
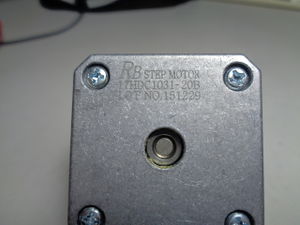
| Stepper Motors | RB Step Motor 17HDC1031-20B |
| Stepper Motor Dimensions | body: 42 x 42 x 33.8mm, rim: diameter 21.95mm x depth 1.7mm, shaft: diameter 5mm x length 18.2mm x face depth: 0.4mm |
| Stepper Motor Drivers | +5V in |
| Fans | 40 x 40 x 10mm; 2-pin DC 24V 1.44W |
| My Slicer Settings | MakerWare v3.9.2.1357 Download (as of 6/21/2018) |
The biggest problem with this printer is the lack of documentation and part numbers! I am going to try to document as much as possible here.
Contents
- 1 CTC Bizer Dual Nozzle
- 1.1 Product Review
- 1.2 Upgrades
- 1.3 Problems
- 1.3.1 Extruder Motor Clicking
- 1.3.2 Filament Tension
- 1.3.3 Extruder Slipping/Grinding
- 1.3.4 Flow Rate
- 1.3.5 Bed Adhesion
- 1.3.6 Bed Warping
- 1.3.7 Heated Bed Caught Fire
- 1.3.8 Nozzle Clogging
- 1.3.9 Wobbly Y-Axis
- 1.3.10 Drive Belts Wearing Out
- 1.3.11 Wire Fatigue (Motor Problems)
- 1.3.12 Unenclosed Chamber (Temperature Problems)
- 1.3.13 Corrupt Print Files
- 1.3.14 Print Stops or Carriage Crashes
- 1.3.15 Hollow Walls
- 1.3.16 Back Current from Moving Motors
- 1.3.17 Build Plate Chassis is Weak
- 2 Other Resources
Product Review
My Experience
In the least words possible, I would describe the CTC Bizer as frustrating at times, yet an excellent learning experience and a great printer in the end. When I started shopping for a 3D printer, I was debating whether I wanted to build my own and learn a ton about 3D printers, or buy a pre-assembled printer and get to printing things immediately. I discovered that the CTC is a great compromise between the two extremes. It comes pre-assembled and allows you to start printing after a few hours of tinkering, but it also has faults that force you to upgrade it and learn more about the inner workings of a 3D printer.
Pros
- Heated bed
- Decent print quality
- Prints ABS or PLA
- Dual nozzle
- Highly customizable
- Cheap
Cons
- Stepper motors don't last long
- Doesn't come with tube or filament guide
- Spool holder is terrible
- Static electricity causes failures
- only takes .x3g format files from SD card
- Print bed is not sturdy
- Y-axis has some wobble
Upgrades
New Stepper Motors
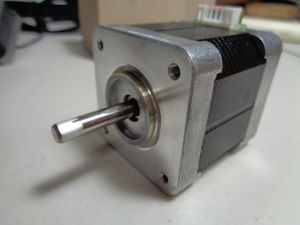
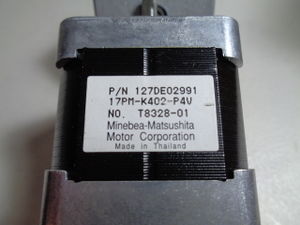
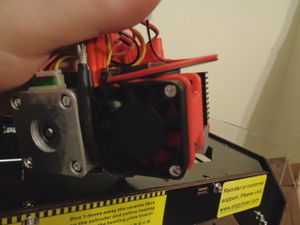
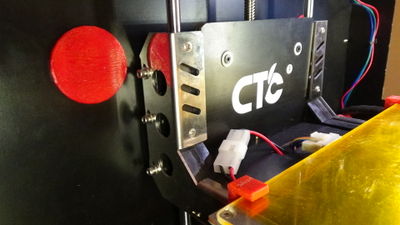
Here is the data for the replacement stepper motors I got for the extruder. An important thing to note is that they are longer in the back, and so they were getting caught on the bolts on the backplate of the print bed. I replaced the bolts with washers and countersunk bolts that do not protrude as much. Also, the new motors are about 50% heavier, so it's like adding a third motor. I was getting backlash, resulting in sloppy prints. I could possibly compensate for it in software, but it will probably also cause more wear and tear over time, so I removed one of the motors and replaced it with a plastic frame. I never used the second extruder anyway.
| Motor Specs | |
|---|---|
| Model |
Minebea Motor Manufacturing Corp. |
| Current | Up to 1.4A |
| Voltage | Up to DC 36V |
| Step Angle | 1.8 deg/step |
| Holding Torque | 5.5Kg.cm (76 oz-in) |
| Connector | 6 wire uni-polar or 4 wire bi-polar |
| Pinout |
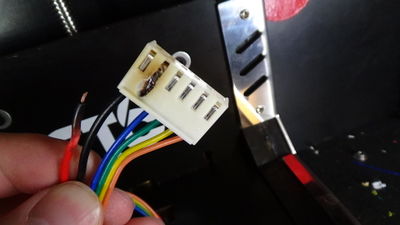
PIN1=B-, PIN2=COMMON, PIN3=B, PIN4=A, PIN5=COMMON, PIN6=A- |
| Dimensions | 42 x 42 x 44.6mm, rim: depth 1.9mm x diameter 21.95mm, shaft: length 20mm x diameter 5mm, shaft has no face |
| Mass | 322.3g |
| Comes With | GT2 2mm pulley (teeth count 25), Connection wires, Anti-vibration mounting bracket |
So far, I've only needed to replace the motors on the extruder. The X, Y, and Z axes are still going strong. It takes a surprising amount of force to push the filament through the hot end.
Problems
Extruder Motor Clicking
Almost everyone who buys a CTC experiences extruder clicking. This happens when the stepper motors are missing steps. There are many reasons this would happen, but with the CTC the answer is simple:
THE STOCK STEPPER MOTORS ARE JUNK!
Like most of the parts in the CTC, the stepper motors are generic, undocumented, Chinese made rip-offs. They don't have the torque to do the job and they wear out very quickly, rendering them completely useless. Most people who angrily return the CTC do so because of this problem. I, personally, got about 20 small/medium sized prints (about 0.5 kg of filament) before the motor was wrecked. I never used the second extruder, so I swapped the motors and got another 20 prints out of it.
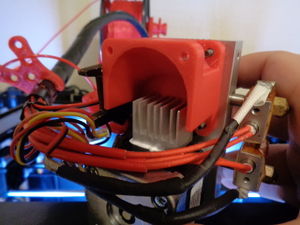
I initially found that I needed to print at excessive temperatures to extrude consistently: as high as 240C for ABS. This reduced the quality of my prints. I bought new motors (see New Stepper Motors) that were larger and heavier than the old ones. I found that they were too heavy to have two of them installed. This wasn't a problem for me because I never used dual extrusion anyway. I removed one of the motors and replaced it with a custom cowling and a fan to keep the other motor cool.
The new motor tends to get hot and the stepper drivers on the CTC do not have any way of adjusting current. Another crappy thing about the CTC is the the pinout for the stepper drivers are backwards, so you can't just buy different drivers and install them straight into the board. You would have to install them upside-down, but there is no room for the heatsink because there are some capacitors on the main board that are in the way. So you could install them with some kind of riser, but then the drivers would be sticking out of the bottom of the printer. You would either need to cut out a bit of the bottom panel, or just not use the bottom panel. Then there's the matter of cooling. You would have to mount the fan in a very awkward position to cool the drivers. It's just a mess; I opted to keep the original drivers and add a cooling fan to the extruder motor. It has been working fine for over a year.
| Factors that contribute to wearing out the motors | |
|---|---|
| Problem | Solution |
| Filament tension; requires too much torque to pull the filament through | Find a way to mount the filament spools above the printer to lower the filament tension. Use a spool holder with bearings. |
| Temperature too low | Raise the temperature until clicking is less frequent (don't go above 240C) |
| Nozzle clogged | Remove the nozzle and barrel, remove PTFE liner, soak nozzle/barrel in acetone for 5 minutes (closed container that won't dissolve in acetone), clean with q-tips, clear nozzle opening with small wire or guitar string. |
| PTFE liner is warped/split | Replace with new liner (L 33.5mm, ID 2mm, OD 3mm) |
| Printing too close to bed | Adjust the gap between the bed and the nozzle. |
| Over-extrusion: flow rate is too high | Reduce the extrusion rate in your slicer settings. |
| Printing speed too high | Reduce the printing speed in your slicer settings. |
| Filament diameter is not set properly in software | Don't believe the label; measure the filament with good calipers, measure it different places and directions, enter the averages of the diameters. |
Filament Tension
You need to make sure that the filament is able to move freely enough so that the extruder can pull it through without slipping. If it's too difficult for the extruder to pull the filament, you can try putting the spool on a holder above the printer. When you pull filament from below the spool, it's much easier on the extruder and the spool tends to turn more consistently. If pulled from above, the spool will sometimes suddenly rotate because of uneven weight distribution. This causes the filament to become loose, slip off the spool, or get tangled.
For my CTC I ended up using this spool holder from Thingiverse (link).
You can put the spool on bearings, but I have not needed to do this. It's better for the spool to rotate on a steady axis instead if just hanging on a bar. Be sure the bearings still have some resistance. If the spool turns too freely, the extruder might make the spool unwind when it tugs on the filament.
Extruder Slipping/Grinding
Extruder slipping is when the drive gear starts eating into the filament and can no longer pull it through. This can be caused by several things:
Clogged nozzle
- Solution: clean the nozzle and/or replace the PTFE liner.
Nozzle heat too low
- Solution: Make sure your heat setting is high enough to melt the filament quickly.
Nozzle heat too high
- Solution: Lower your heat. If nozzle heat is excessive, the filament can become molten too far up into the cool end of the extruder and the drive gear will eat into the soft plastic.
Inadequate extruder cooling
- Solution: Get a better fan. Make sure there is good contact between the extruder block and the heat sink. If cooling is inadequate, the filament will become molten too far up into the cool end of the extruder.
Too much pulling force required to pull filament
- Solution: Set up a better spool holder or increase nozzle heat. This can also be caused by a jammed spool or other situations that make it difficult to pull the filament.
Spool jam
- Solution: Find a new spool holder. I found the spool holders on the back of the CTC were terrible. Things worked out much better when I hung the spool above the printer.
Drive gear teeth are dirty
- Solution: Clean the drive gear. If the teeth are filled with bits of plastic, they won't be able to bite deeply into the filament. So if your filament slips, don't just re-feed the filament and try printing. There is a high chance that it will slip again unless you clean the drive gear.
Deviated filament
- Solution: Clean any bits of plastic from the extruder and make sure the drive gear has minimal clearance to the extruder assembly. Deviated filament is when the filament is fed through the drive gear but it starts to curve and get jammed into a place that it's not supposed to go. In the CTC, it tends to jam in between the assembly and the extruder block.
Flow Rate
I found that I needed to reduce the print rate to avoid extruder slipping. For higher quality prints, I print at a much slower rate on the first layer, the outer shells, and the base of the raft.
Bed Adhesion
The best solution for bed adhesion I've found for printing ABS is this:
- Heat the bed to 110° C
- Use a borosilicate glass plate
- Clean the glass with acetone and a paper towel
- Cut a sheet of kapton tape that will cover the glass. I actually cut a piece that does not go all the way to the edge on the left and right, but hangs over the edge on the front and back.
- Spray the glass with a window film application solution (or equivalent soap solution)
- Apply kapton tape to glass
- Use a rubber roller to eliminate bubbles and remove as much soap solution as possible from under the tape
- Trim edges of tape with X-Acto knife so that about 1 cm of tape remains hanging over the edge
- To accelerate drying, place the glass plate on the heated bed
- Continue to use rubber roller to squeeze out bubbles as the heat causes gas bubbles to form
- While heating, spray the top of the plate with soap solution and use a window film applicator/squeegee
- When bubbles stop forming and all liquid around the edges of the tape is dry, take the plate off heat and let cool
- Fold the edges of the tape under the glass plate. Take care to not allow any wrinkles or air bubbles
- Sand the top of the kapton tape with fine-grit sandpaper until "cloudy"
- Dissolve scrap ABS plastic in acetone to make a thick slurry about the consistency of maple syrup (white ABS is best)
- Dab a paper towel in the slurry and apply it to the plate (while the plate is cool). Ensure an even distribution.
- Once the slurry is applied, you may heat the plate, level the bed, and start printing
It is also important to avoid warping of the print to maintain adhesion to the bed.
Bed Warping
Before heating, the bed is slightly concave. After heating, it will expand and become flatter. It may still have a small curve to it. You can try taking the bed off and bending it a bit to straighten it out, but be careful not to damage the heater PCB on the bottom.
I ended up buying some pieces of borosilicate glass (Pyrex) as print surfaces. The dimensions of the glass are 23cm x 15cm (3mm thick). Be sure to adjust you Z-axis height to compensate for the extra bed thickness. Use clamps to hold the glass plate on, but don't clamp it with too much pressure or the glass will bend. Also, make sure the extruder nozzle won't slam into the clamp at any point.
Heated Bed Caught Fire
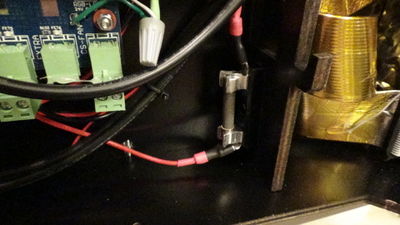
Yes, I had a fire. It was caused by the connector to the bed heater. To reduce the chance of this happening again I replaced the power and ground wires with thicker wires and I used a different connector for power and ground. I properly soldered the wires to the connector. I also put a fuse on the power that goes to the bed.
Nozzle Clogging
It's very normal for the nozzle to get clogged after a certain amount of usage. It's just part of normal maintenance.
Some signs that you need to clean the nozzle:
- Filament is coming out oblong, flat, or with a groove in it
- Filament is coming out with specks or bubbles
- Filament is curling as it comes out
- Nozzle stops extruding
- Print has small voids or blobs (may just need to clean the outside of the nozzle)
Here is my nozzle cleaning method:
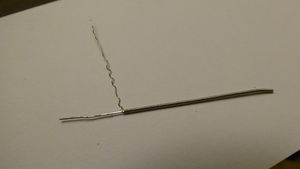
For short term nozzle cleaning, I use steel guitar strings. I bought a 3 pack of Fender electric guitar strings, and that one pack will pretty much last a lifetime of nozzle cleaning. I've been using the A-string. The inner wire has a 0.4mm diameter, and it fits snugly into a 0.4mm nozzle. The outer wrap wire has a 0.25mm diameter, and when you unwind it it has a wavy pattern to it. I sometimes use this because it's a little better for pulling material out instead of pushing it in.
Sometimes, I use a small soldering sponge (dry) to clean the outside of the nozzle.
After a while, shoving wire in the nozzle just won't cut it. You will need to replace the PTFE liner and clean the nozzle and barrel very thoroughly. This is pretty straight forward. Here's a little advice:
- Remove the nozzle and barrel, remove the PTFE liner, and soak the nozzle and barrel in acetone
- Cut the PTFE liner very carefully: use a 2mm/3mm inner/outer diameter tube and use calipers to cut it to exactly 33.5mm
- After soaking in acetone, clean the nozzle with q-tips with the cotton removed
- Use a guitar string or other small scraping device to scrape the inside
- Ensure it is clean by inspecting the inside visually, otherwise it's hard to tell if you got everything
- Hold the nozzle up to a light and look through the hole; it should be a perfect, circular pinhole
Wobbly Y-Axis
Some CTC owners have experienced wobbling on the Y-axis, which will cause "ringing" or waves in the print on the Y-axis and perhaps lower dimensional accuracy. I have yet to experience this problem, but I plan to mitigate this to see if I can improve the minor ringing that I experience.
The Y-axis pulleys are on the horizontal bar above the print bed behind the vertical rails. Many people have seen this bar become wobbly and start to flex as it prints. The solution is to install two support brackets with bearings. There are several designs available on Thingiverse:
- https://www.thingiverse.com/thing:1840194
- https://www.thingiverse.com/thing:901901
- https://www.thingiverse.com/thing:1097924
- https://www.thingiverse.com/thing:1341541
- https://www.thingiverse.com/thing:1671985
Since I have not installed mine yet, I cannot comment on the effectiveness, but I will update this section when I do.
Drive Belts Wearing Out
If you are noticing an excessive amount of rubber powder coming from the drive belts, you may need to realign the pullies so that the belt is not rubbing on the inner edges.
Wire Fatigue (Motor Problems)
Sometimes the wires that go to the X-axis motor get fatigued from repeated bending. I have not personally experienced this problem, but it is a common problem with the CTC. People usually solve this by using a cable chain (link).
Unenclosed Chamber (Temperature Problems)
If you print in ABS, you know that it has a higher coefficient of expansion than PLA. This means that as ABS cools down it shrinks. While printing in ABS it is important to control the temperature of the print because if different parts of it cool down at different rates it will crack, warp, and even lift off the bed.
One of the best ways to control temperature is to create an enclosure for the printer. This keeps the heat inside and keeps the print at a consistent temperature.
For a long time, I used a bed sheet. I would hang it from my wall and draped it over the printer while it was printing. Recently, I got some clear acrylic and cut them into pieces to use as covers for the two sides and the front, and I constructed a large box to put over the top. I didn't want to make the printer inaccessible from the sides, so I put all side panels on hinges and used magnets to make them latch.
The CTC also has several holes. The chamber doesn't need to be air tight, but the less airflow the less cooling. There are many printed parts you download for free in Thingiverse:
Corrupt Print Files
If you start getting corrupt files on your SD card, try these:
- Reset your slicer settings to the default
- Reinstall your slicer software
- Reformat your SD card
- Test your SD card for bad blocks
- Before you remove your SD card from your computer, right-click the drive and select "Eject", or on Linux run the
synccommand - If all else fails, the printer itself may be having problems with static electricity (Read more).
Print Stops or Carriage Crashes
I had an issue where prints were stopping mid-print and occasionally an axis would "run away" meaning it would try to move the carriage in one direction without stopping. I troubleshot everything (slicing software, SD card, configurations, limit switches) but I discovered that the problem was caused by a build up of static electricity. This started happening in the winter when the air was very dry, thus static electricity would build up on the electronics. At some point during the print this would cause a read error on the SD card (presumably when an electrical discharge occurs). The results were inconsistent (same file would fail in different places). The electronics in the CTC are not well grounded. I also read that RF generated by the wires that go to the stepper motors can cause interference.
Here are my solutions:
Provide proper grounding for electronics:
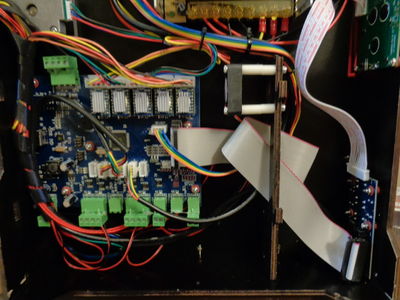
There are several grounding attachment points on the main controller board, but none of them were being used. Out of the box the controller board is completely ungrounded. I soldered a wire to one of these ground points and routed it to ground on the mains AC input plug.
Provide RF shielding for electronics:
I covered every ribbon cable with aluminum ducting tape, then covered the aluminum with kapton tape. I then covered the front panel and SD card reader PCBs with three layers: kapton tape, aluminum tape, and more kapton. I added wires so that all of the aluminum shielding can be connected to ground.
Re-route the stepper motor wires further from the SD card reader:
The stepper motor wires on the right side of the machine were too close to the SD card reader. I re-routed the wires so that they go through the print chamber. It's ugly, but it works.
Conclusion:
It was over-kill, but it is now a year later and I have yet to have a single problem with static.
Hollow Walls
There are times when I am tempted to add additional shells to my print. Sometimes when you are printing a thin wall with too many shells, there won't be enough inner volume to print an infill, so you end up with a hollow wall. he solution is to use fewer shells. Most models you download (from Thingiverse or other sources) will be designed for 2 shells.
Back Current from Moving Motors
If you move the extruder carriage by hand, move it slowly. If you move it too quickly the motors will generate an electrical current that flows back into the electronics. Even when the printer is off, you may see the LCD screen light up simply by moving the carriage. This has a chance of damaging the electronics, so be careful.
Build Plate Chassis is Weak
On the CTC, I eventually found that the plastic build plate chassis (the carriage that the build plate is attached to) was weakening and starting to get bent. On side was drooping more than the other. If you have the means to cut some metal plates as reinforcement, that would be ideal. I ended up buying metal reinforcement brackets designed specifically for the CTC. Sorry I don't have a link, but I can't find them anymore.
